Saturday 19 February 2022

The unlikely Ganger

As many of you will know from Dave's wonderful Wargames sculptures blog, this month is Fembuary, now Dave those some great challenges like paint what you got. 

Now while I'm not a great one for taking part in challenges, as I'm very much a do what the mood takes me hobbiest. It just so happens that I was painting up an Easher gang for Necromunda & for those of you who didn't know the Easher's are an all female gang, so now you see the connection with Fembuary 🙂

Now as these models where made up about a year or more ago it nice to finally have them painted up, so I guess you could say that I done two challenges in one go 👍

It's an odd thing & something I find happens with me quite a lot, in that I can dread the thought of painting models, especially GW ones as they have so much detail on them. 


As it turned out, once I got going with these I managed to get through them fairly fast, at least but my standers that is 🙂 In the first picture above is the gang leader (on the right) & a champion, next is a specialist ganger, followed by 4 ganger, with the photo above been 3 juves. 


After I'd made up my Easher gang I'd a few parts left over & as I'd a few female models that I'd got from Mantic cheap a couple of years back, I thought why not try & make up a few extra gangers. These are the ones in the picture above & while the 2 on the left I think fit in kind of OK with the rest of the gang, the one on the right doesn't, but can be used as what are called hive scum.

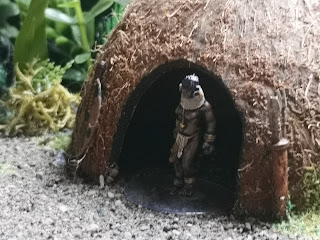
Next we come to the star of the show 😂 while looking at the models on the Mantic frame I noticed a model that would be the most unlikely one for Necromunda and thought to myself why not.


I'm not sure that flipflops are still a thing in the 41st M but you go with what you have right? Anyway I want to give a big thanks to Dave as I am now on holidays and without his challenge I know I wouldn't have got all these models painted up before I left.


As always my thanks for dropping in and if you'd care to leave a comment it would be welcomed 🙂

Saturday 12 February 2022

Behind the scenery, Native Village

 Welcome to another behind the scenery, it's another shoebox set, that will be a native village.

Now before I go any further I want to point out that I've not done any art painting since I was in school and as you can see from the picture below it shows 😂

Back drops make a big difference & are something I'm going to have to up my game on, but back to what I'm trying to do here. 
The picture below looks a bit better but still a long way off what I want. 


By now I was getting a feel for what I was trying to do, with the picture below more like what I was looking for. As you can see below it's given the appearance that it a village in a clearance.
I now got rid of the sheet of paper I'd used in the above pictures for a backdrop & instead painted the back & part of the two sides of the box, as seen in the picture below.
Below is a picture of the box with the painting done, I'm not sure yet if I'll need to lighting it up a bit, as I think it is given more of a night time feel, anyway a little tip for you, fit your ground piece before painting.
I don't feel that the bottom of the box is strong enough to just use so I'm putting in some form to strengthen, but you could use other stuff. 
With the form dry fitted I used some no more nails to stick it with.
I also put some on the edges of the form to stick it to 3 of the sides of the box, hence why you should do this before painting, & as I was using 2 pieces I stuck some skewers to help make the joint stronger. I should add that in the pictures above I was just using a piece of grass covered paper just to get the feel for what I was doing.  For the huts I use Coconut shells that I picked up in a petshop a while back & added a few little details.
 
After given the form a dark brown paint I then textured it with different sands & gravel, using finer stuff for what will be the clearing & pathway leading off into the jungle. 
Next I done some flocking, these areas will be what I hope when I add the foliage will help blend the whole thing together. 
So with the foliage done how did it all turn out ? Well I'll let you guys be the judge of that.


A fun little build & cheap to do, so even if it was never used the value in hobby time to cost makes this well worth it. But hopefully you guys will be seen it in an up coming production 😊

That's it for this post, as always my thanks for dropping in & if you'd care to leave a comment, it would be welcomed.

Followers